

It's no secret that you need hundreds of posts (not dozens) if you want to build a successful blog-based business that can generate enough cashflow to support your dream lifestyle…
And…
Each post needs to target a specific keyword, plus it must be optimized for SEO (search engine optimization) in order to get the Google algorithm to start driving you the traffic you desire.
But…
The 100% manual approach to researching your posts, creating writing briefs, outlining the posts, and writing the first drafts can take several hours, if not days, per post.
Luckily, you live in the age of AI and you can get all of these daunting tasks done for you in a jiffy using a tool called Frase.io.
Plus…
It can help you go back through your older posts and optimize your existing content, too.
Here's the gist…
Google's algorithm is based on math and code… Obviously, right?
There's no human there deciding which site belongs in each spot for each of the trillions of google search queries per year… A simple software script called ‘The Google Algorithm' does all that work behind the scenes.
Therefore…
By studying what is currently ranking for any specific keyword phrase and effectively analyzing their on-page SEO metrics, you can get a clear picture about the content you need to create in order to rank on the first page of Google for that phrase.
Simple stuff…
Here's the cool part.
Until recently, we had to do all of this research manually and it took hours… Sometimes days for bigger posts.
But today, you've got access to some AI tech that can get this all done in minutes.
Before we get into the step-by-step tutorial using the AI SEO tool, if you're interested in learning the old-school manual process for creating an SEO-optimized outline and blog post manually, watch this YouTube video where I teach the whole process.
Tens-of-thousands of students just like you have learned to scale their blogs with this process above.
But, today…
You're learning the high-tech way to get more SEO content published faster than ever before.
Ready to jump in?
Great!
Step #1 Keyword Research
Now, you're still required to bring a keyword phrase to the table that you're wanting to create an optimized post on.
I use this tool for all my keyword research.
If you've been following my teachings and trainings for any time now, you're already a keyword research pro…
But, just in case you need help finding great keywords for your blog, here's the quick overview with free tutorials and resources:
This blog post that teaches you how to find low competition and high search volume keywords.
If you're totally new to the idea of keyword research, start with this video here and do a full keyword research brainstorm FIRST before jumping into the keyword tool.
Then, move on to this video which shows how you can quickly analyze the search volume and competition for each keyword.
Ok, cool…
Once you've got the keyword you seek to target, let's jump into the tool!
Step #2 – Get Started With The $1 Trial
To follow along step-by-step with this process laid out below, you'll need access to the AI tool called Frase.
You can get a $1 trial through this link here.
Yes, that's an affiliate link and I do earn a small commission if you purchase through my link…
But you still pay the same price.
This is your chance to support my content and know that the only reason I'm recommending this product (and creating this tutorial) is because it's a game-changer for bloggers and content marketers.
I've tested several of their competitors over the years and other AI tools…
Nothing beats this process you're about to follow, below for creating new SEO optimized content from scratch, fast!
But you need an account to follow along, so get on the $1 trial and give it a shot to see if you think it'll help out your SEO and content creation workflow.
And notice… Their base-level account is only $14.99/mo for up to 4 articles/mo…
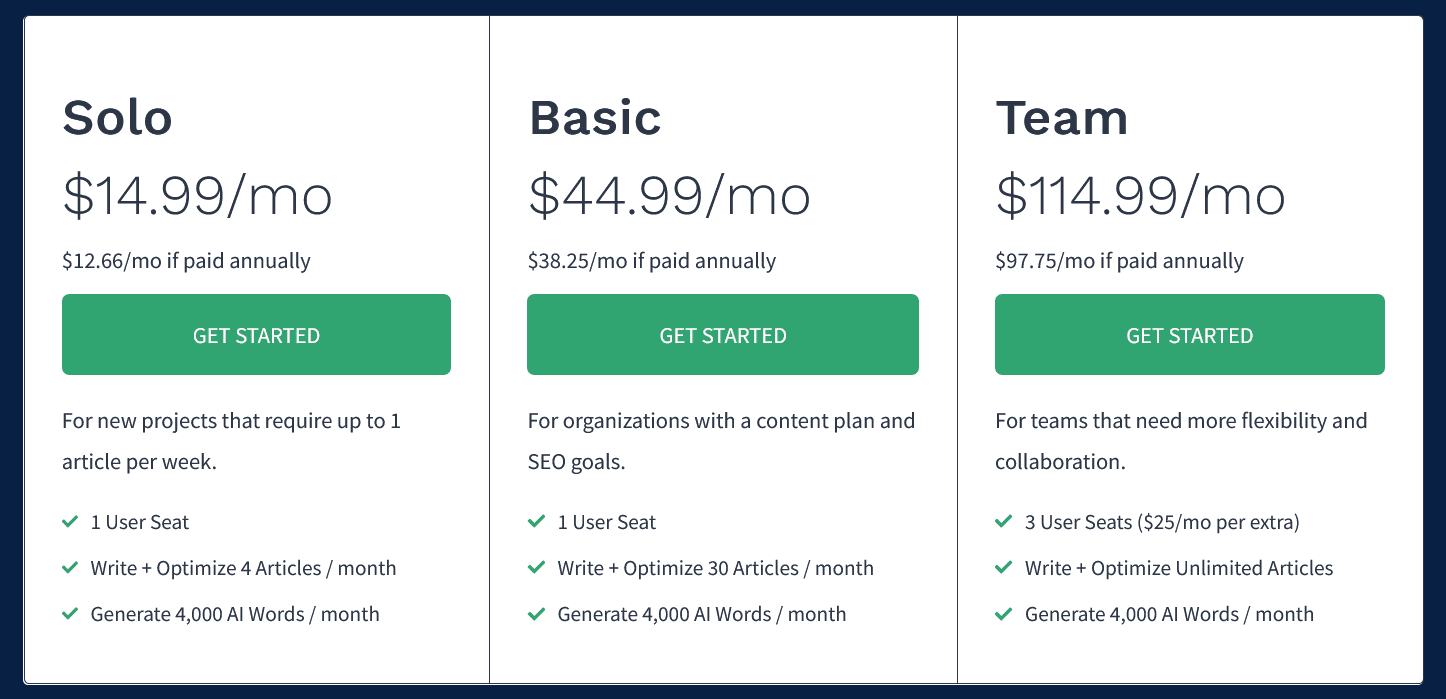
That's the place to start if you're new…
Now…
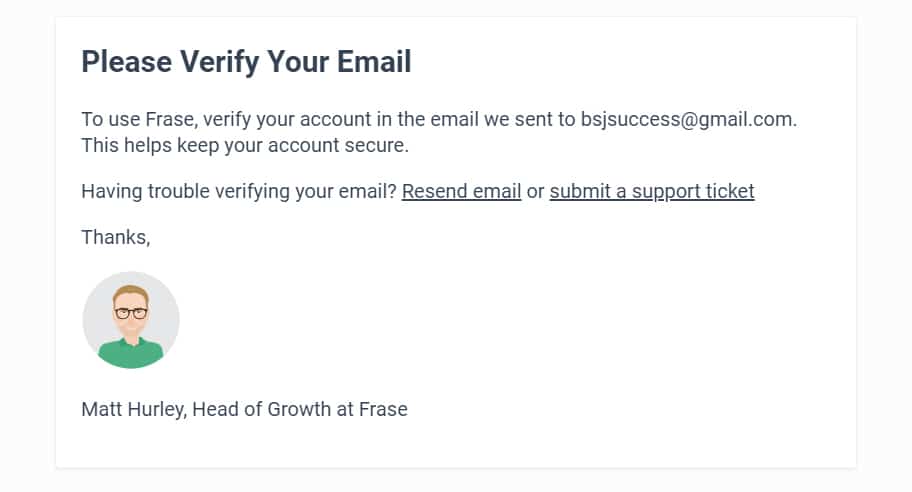
Going through their checkout process, they'll prompt you to verify your email address before you get to the checkout page…
IMPORTANT NOTE:
I didn't receive the verification email right away… I had to click that ‘resend email' link and then it showed up instantly…
Also, notice the “Pro Addon” checkbox on the $1 trial checkout page (image below)…
It's checked by default and it upgrades your account to include an unlimited number of words created by their Artificial Intelligence…
I believe this is an important add-on to give you sufficient ammunition to really put this tool through it's paces!
You still pay $1 today but it does increase the monthly rebill amount.
So I wanted you to know…
If you un-check that box, you'll only have 4,000 AI generated words to work with… (vs unlimited with it checked)
Either way…
The goal is for you to put this thing through it's paces during the 5 day trial and if you don't want to be rebilled, cancel before the 5 day trial is up.
So you may want to go big for 5 days and really test it out to see if it is for you!

Ok…
Wanted to make sure you knew there were a couple of unique steps in their checkout process as you're getting started.
All in all, you'll need an account now to jump in and let the AI build your outline from the keyword phrase you're targeting.
Ready?
Great!
Let's get to work!
Step #3 – Start A New Document
If you're in the US and your site is in English, all you need to do in this step is enter your keyword into the “Target Search Query” field…
As you can see here, I'm using this to create an affiliate comparison post by targeting the keyword phrase ‘frase io vs surfer seo'
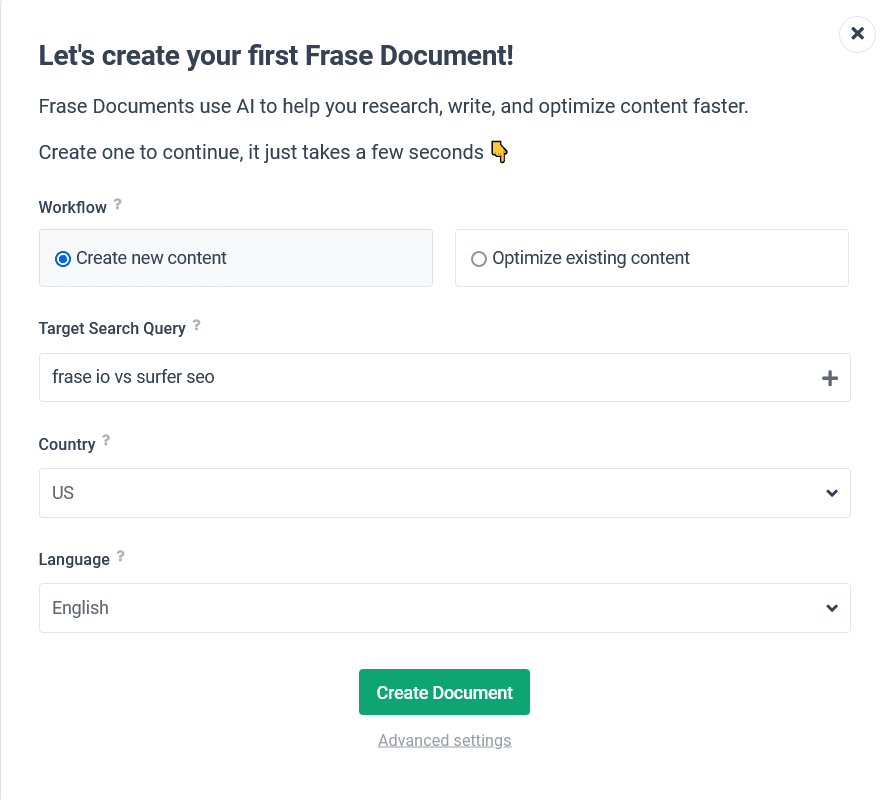
Obviously, if your site is in another language and/or targeting users in another country, set those two fields as appropriate.
Ok, that's it for this step…
Click the green “Create Document” button and get ready to unleash the AI!
Step #4 – Let's Go!
After completing step #3, you can see your document setup and there are 2 options at this point.

First, you can import one of their templates (#1) to use as your writing brief with the link that shows up above your document title.
This will give you a basic outline based on the type of post you're creating, like this:

If you're new to blogging or if you're outsourcing the writing of your content to freelance writers, you'll love these content brief templates!
They'll keep you focused on using the powerful content frameworks that consistently rank on Google.
For example…
You can see here that they've got “how to” content briefs, “beginner's guides”, “listicles” and “product review” briefs in addition to the comparison one…
These are the key frameworks that all successful bloggers use over and over!
Ok…
Since the goal here is to quickly outline and write the post myself, and I'm already aware of the framework, I'm going to skip the template and just go with (#2) the green “Let's Go” button to start the automated research process.
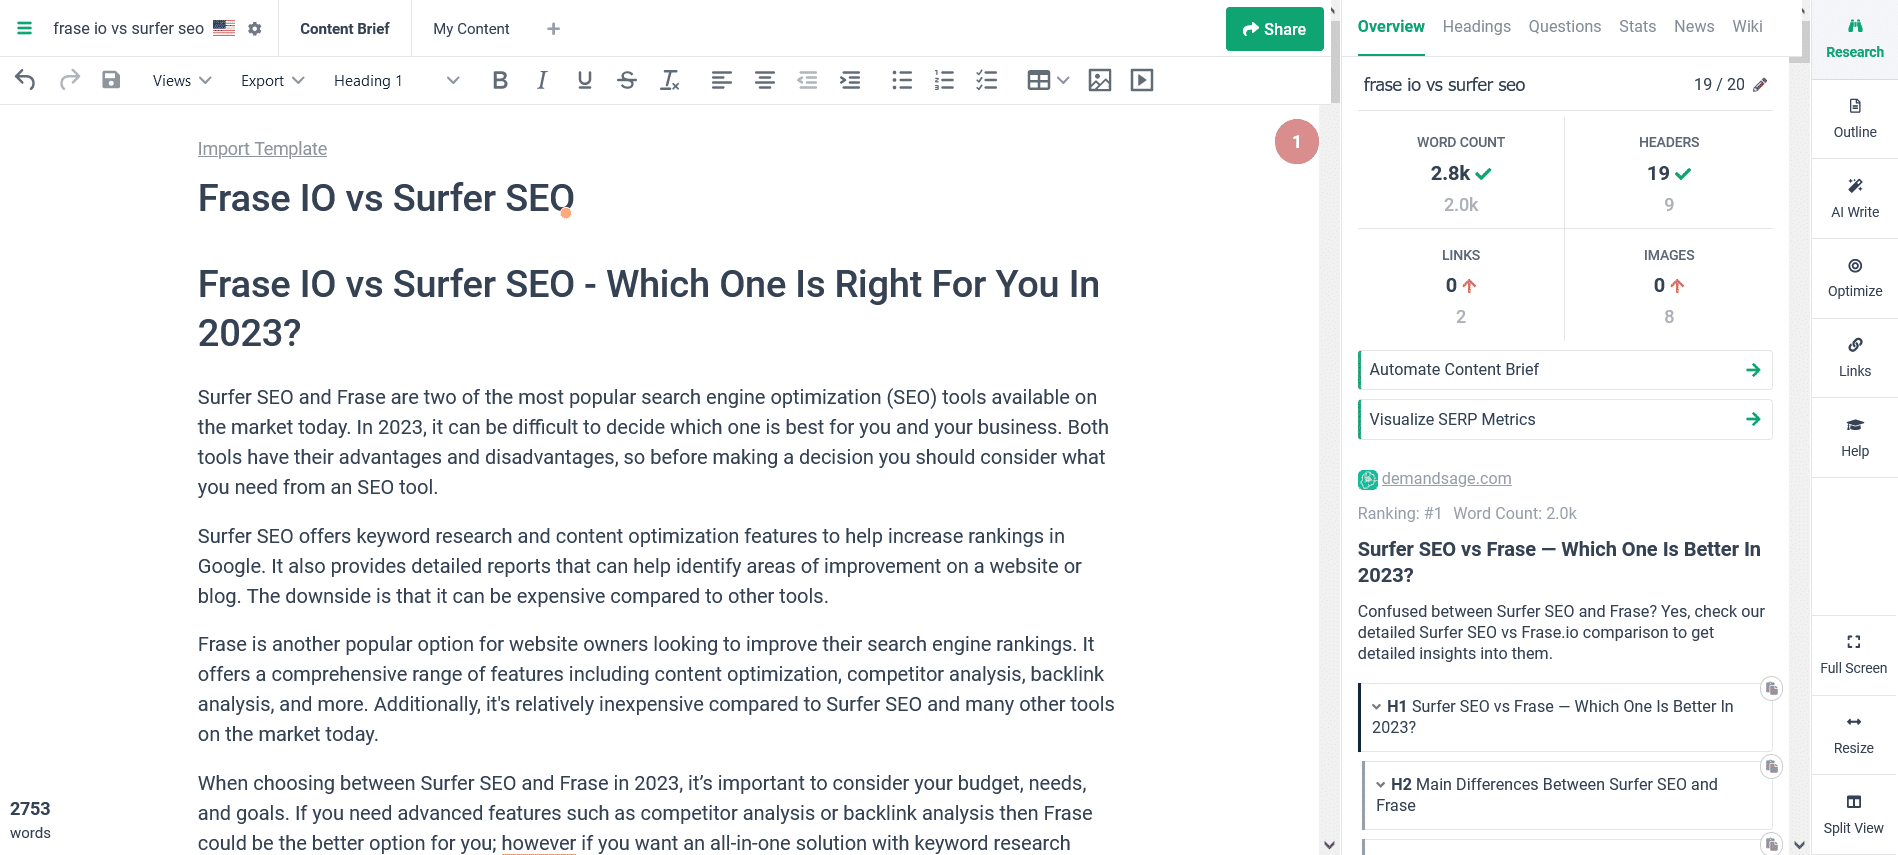
In this process, Frase analyzes the top 20 ranking posts on Google for the target keyword phrase and gives you a quick summary of what you need to create in order to ‘fit in' with what's working…
This appears in the right panel…

As you can see here, I need at least 2,000 words, 9 headers, 8 images and 2 outbound links in order to match whats working on Google for my keyword phrase.
Now… Quick note on these datapoints.
I don't over-optimize for them, to be honest. They're rough targets for me.
That said, my site has a lot of strength as I've been publishing here for nearly a decade, so I've got a bit more ‘wiggle room' to under-optimize a bit and still rank.
If you're new and haven't published your first 100 posts, yet…
You'll want to get closer to the end result numbers!
If you've got a strong site, you can use them more like loose guidelines, too.
Ok, once the research is done, click on the “Outline” tab on the far right…
Step #5 – Let The AI Outline Your Post!
After the research phase completes, you have 3 choices…
- Select headings from search results (aka your competitors)
- Generate heading ideas with AI (this is the one I chose)
- Paste your own headings (if you followed the manual process in the video above)

Once you click on the ‘Generate Heading Ideas with AI' button it takes a few minutes to process your request…
Then, you'll see your AI-generated SEO-friendly outline in that same window pane, like this:

Now, you can reorganize these by dragging them around…
Or, if you want to change a title or modify it's place in the hierarchy, simply click on the item and it'll highlight yellow where you can type in a better optimized title and you can also change it from an H2 to H3 as needed.
At the bottom of this panel (not shown) is the option to add a custom header if you want to manually add one.
Now…
If you click on the “Explore Headings” button on the top of the outline panel (circled in red above) it'll show you all of the headings from your top competitors on Google to compare…
Like this:

This allows me to ‘see' if I'm missing any key ideas in my outline that my main competitors have…
The main window here allows you to scroll from left to right to see more and more of your competitors' outlines all on this one screen.
And…
Just in case you're wondering about the difference between ‘headings' and ‘the outline' since I'm mixing and matching those phrases…
They're the same thing.
Your outline is made up of your headings.
- Your H1 is the title of your post
- Your H2s are the main pionts
- Your H3s are the sub-points
Ok…
Now, at this step, you'll want to whittle down the number of headings to match what the research phase said you should have as a minimum.
Plus, you'll save writing credits in the next step by having fewer headings…
So spend the time you need on this step to refine your outline making sure it does hit all the main points and it's as close to the headings number as possible from the research tab!
Once you're outline/headings are dialed, click on “Save Outline” and it's time to move on!
Step #6 – Your AI Generated Blog Post!
After clicking the ‘save outline' button you'll now see the ‘Generate Draft' button in the right hand window where your outline is…
Or you can click on the AI Draft tab at the very top…
They take you to the same palce and it looks like this:
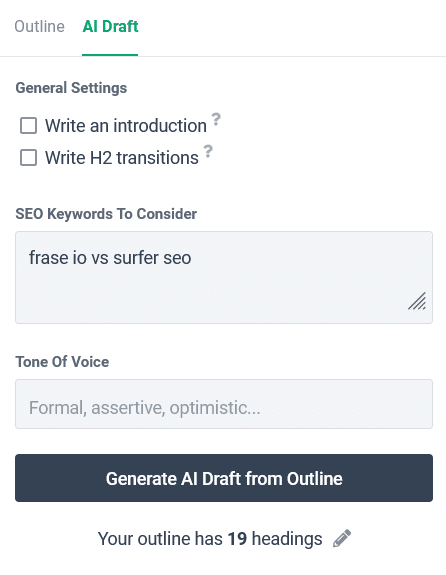
Now, I re-enter my target keyword in that box and you can give it a tone of voice if you'd like.
For example, you can use ‘persuasive' if it's an affiliate product review, authoritative if you're going for the expert approach, or friendly if it's a how-to and your brand is meant to be approachable.
You can leave the tone of voice empty if you don't have any ideas…
But, just know this is how you coach the AI on your ‘style'.
Ok, once done, click the “Generate AI Draft from Outline” button to unleash the ai seo copywriter!
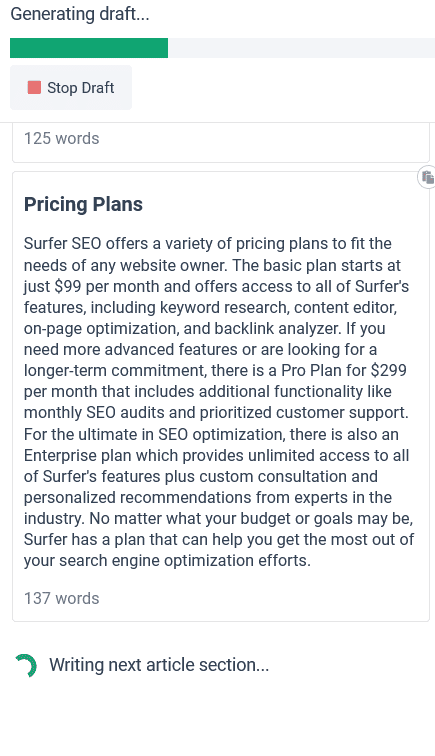
Over the next several minutes, you'll see each section from your outline getting longer text added in that window, like this:
Once the AI copywriter finished writing out all the sections for each of your headings, you have a few options…
First, you can double-click on the heading and then double click on the copy under the heading to add both into your text editor in the main window.
You could also click the Paste Into Editor button up top…
But…
If you don't like the copy that the AI wrote for you, you can also click the circular arrow button to have it re-generate that copy block.

Remember!
If you did not add on the $35/month Unlimited AI Content option to your order, you are limited to 4,000 words per month of AI copy…
So, if you want to do lots of re-writing, you'll definitely need the pro upgrade!
And, let's be honest…
It'll save you several hours of re-writing things manually which is well worth the $35!
Now… I ran all 2798 words that I generated through CopyScape which is a plagiarism checker, to make sure it was indeed 100% unique content.
It passed!

Copyscape is cheap to use and it may give you some peace of mind here.
Cost me less than $0.30 to check and make sure this content is NOT matching any content on the web.
Not a required step by any means, I just wanted to show you that this is indeed unique content coming out of the AI copywriting engine.
Ok…
Once you've got all the headings and the AI copy you like added to your document window, you're ready to move on to optimizing…
Your screen should look like this before going on to the next steps.
Step #7 – Optimizing Your Blog Post!
You'll need to optimize the copy in 3 ways before posting this to your blog.
- First is for readability
- Second is to fact check the AI
- Third is optimizing for SEO
You can do all 3 at the same time, right here in the main window.
First up, you'll need to add several line breaks to each paragraph to make it more readable… Just put your cursor at the start of a sentence in the main document window and hit enter.
You don't want the big blocks of text.
Shorter paragraphs are easier to read!
Then, you'll also want to add in the related keywords that Frase suggests as you're going through the content adding line breaks.
To see the related keywords, hust click on the “Optimize” button on the far right to get the SEO optimization recommendations showing, like this:

Again, these are suggestions based on the math and the code that Google runs on.
You don't have to get every one perfect, but you'll quickly see several ways you can improve the content by smoothly adding in the recommended phrases.
Look at the top of that optimization window and you'll see a progress bar with a little yellow line on it (shown below)
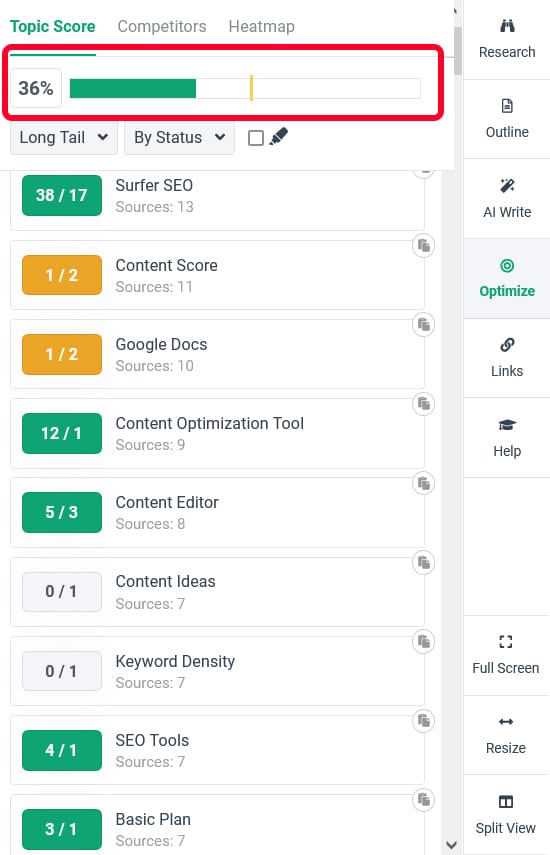
This is your goal when it comes to optimizing your post for SEO.
Getting above that yellow bar and honestly I overshoot it by a little bit, to ‘raise the bar' for future bloggers who may try to come after this same keyword phrase.
A little extra effort optimizing your post now could act as a moat around your rankings and your traffic, helping the post live on page 1 longer.
So it's worth it.
Also…
You may need to fact check the AI as you go through.
For example, on my post, the ‘pricing' section was flat out wrong. It had the wrong monthly prices, it didn't pick up the trial offer and it made up some ‘features' that just weren't real.
So most of the pricing section I ended up writing manually…
Once you're done optimizing your screen will look more like this:
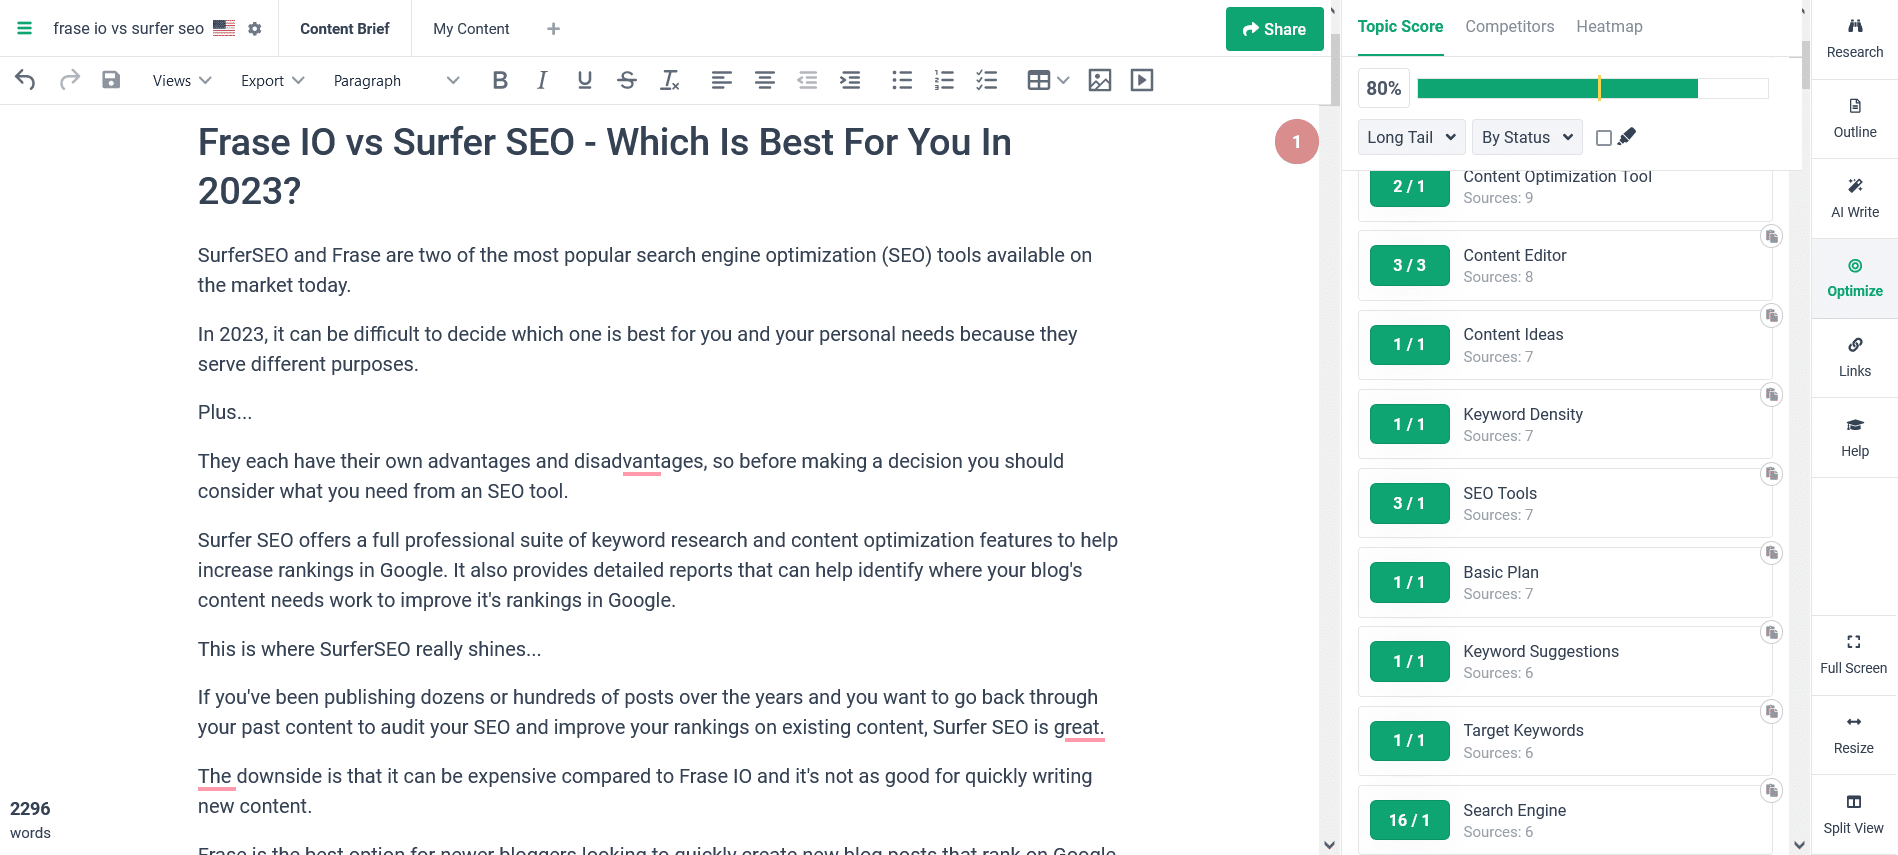
Notice there is variety in the paragraph length in the content itself…
You can see lots more ‘green' bubbles on the right panel showing I've added the related keywords…
Plus, my full progress bar is well above the yellow line.
Step #8 – Publish To Your Blog!
At this point, I simply copy and pasted the content straight into the WordPress editor and added a few images.
For this one, mainly screenshots of the pricing pages…
If you're wanting to ad stock images to your post, be sure you're using royalty free images for your blog posts (as explained here) so you're not risking copywriting infringement.
This really is the easiest part in the process.
All in all, I'm blown away at how fast I was able to go from idea to keyword to properly SEO optimized post here.
It took me about an hour to do everything for this post…
And I could have tightened up my outline even more which would have made the manual editing part even shorter.
You can see the finished Surfer SEO vs. Frase IO review, here.
Now, it's your turn!
If you didnt' follow along with this post in your own account, get started with a $1 trial for Frase here, now
And…
Keep in mind that I'm barely scratching the surface with what Frase can do here in this tutorial.
The focus has been on writing and publishing new SEO-optimized content fast, but you can also…
- Optimize past content
- Create social media posts
- Generate persuasive titles
- Create click-grabbing descriptions
- Rewrite boring content to spice it up
- Expand your short content to reach word counts
- And more!
Go through the full Frase Crash Course training for free here to learn more!
And, final note…
Remember that they have 12 different templates that you can use.
I'm just building on one post type here… but you can see all of their post type templates available to help you create more content Google will love.
Ok… That's it!
Now it's time for you to get into action!