

If you are a blogger, then you already know how important it is to market your brand or business.
Basically, you’ll be thrilled to find any tool that can bring a flood of visitors to your blog.
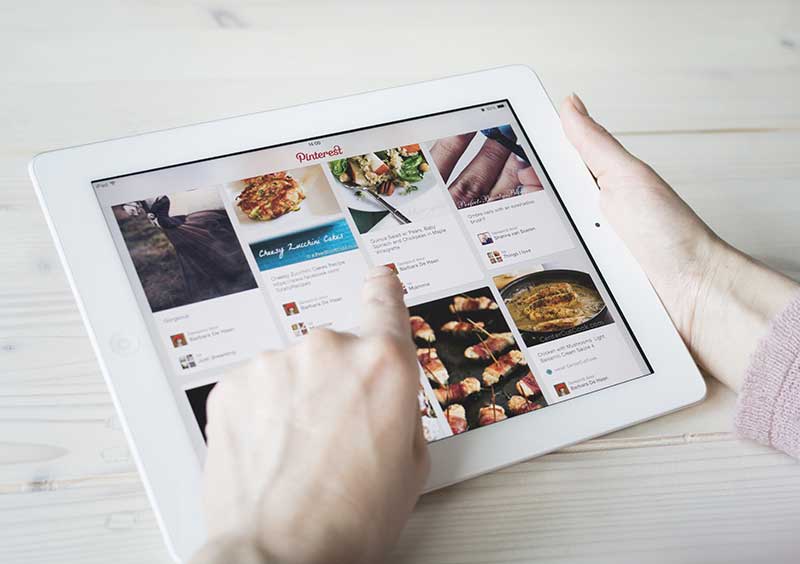
And Pinterest can be the perfect tool in helping you do just that!
What’s so great about Pinterest?
First of all, its popularity!
Pinterest’s active user base experienced 26% growth to over 335 million users in 2020, making it the third-largest social network in the US.
And secondly, its potential …
As long as you can provide helpful inspiring ideas, you stand to drive huge amounts of traffic from the platform to your products and services.
Read on to discover everything you need to know about how to post on Pinterest.
Today you will learn:
- 3 ways to post images from your blog on Pinterest
- How to optimize your images for clicks
- And more helpful Pinterest hacks
So, let’s get started!
How to Post on Pinterest The Right Way
You weren’t aware that there was a “wrong” way to post on Pinterest?
Hate to break it to you, but that probably means one thing …
You’ve been doing it wrong.
Or … maybe you haven’t even started using Pinterest yet.
In any case …
Let’s start at the beginning:
Before you can start using Pinterest for business, you need to create a Pinterest account and profile.
If you haven’t done so already, follow these steps to set up your Pinterest for Business profile.
Now you can get started using Pinterest.com as part of your social media strategy!
Once your business account is set up …
It's time for you to start pinning rich pins from your blog to your Pinterest board(s).
You can quickly accomplish this in five steps:
- Choose (or create) your image
- Create a compelling title and description
- Add a link to your blog post
- Add the right hashtags
- Choose or create a board for your pin
Here’s how to do each one.
Step 1: Choose Your Picture
Connect Visually with Your Audience
You can easily pin a photo or video from your camera roll or your computer by using the Pinterest mobile app.
All you have to do is follow the steps below:
Method #1: Choose an Image from Your Blog
You can use Pinterest to help you pull images directly from your blog post and create a pin on your own board using your post URL.
This is the process if you’re on a desktop:
- Log in to your Pinterest account
- Click on the “+” icon located in the bottom section of the page
- Select “Create a Pin”
- At the bottom left corner, select “Save from Site”
- Paste the URL of your blog post you want to pull images from
- Click the arrow icon and then wait for all available images on the page to load
- Choose an image and then click “Add to Pin”
- Include a title and description for your pin (more on this in the next step)
Easy, right?
Here’s another way you can add an image if you’re using your cell phone.
Mobile Process:
- Open the Pinterest app on your device
- Tap the profile picture located at the bottom of the page
- Tap the “+” icon at the top right corner of the screen
- Tap “Create a Pin”
- Tap the globe icon and then paste the URL for your blog post
- On an iPhone, tap “Go” | On Android, tap “Search”
- Choose the image you want to use for your pin
Don’t want to use an image from your post?
Maybe you want to create an image specifically for Pinterest?
Here are two ways to upload a custom image for Pinterest.
Method #2: Uploading Pins to Pinterest from Desktop
- Log in to your Pinterest account
- Click the “+” sign located at the bottom right-hand corner of the page
- Select “Create a Pin”
- Tap the arrow icon and upload the video or photo from your computer
Method #3: Adding Pictures to Pinterest App
Another way to add your own pins on Pinterest is through the use of the Pinterest mobile app.
The process is the same for both iPhone and Android versions of the app.
Follow these steps to add pictures to the Pinterest app:
- Open your Pinterest app
- Tap on your profile picture located at the bottom of the screen
- Tap the “+” icon at the top right-hand corner of the Pinterest page
- Choose “Create a Pin”
- On your camera, you can then select the image you want to upload from your camera
- Or … tap the camera icon if you want to take a new photo
- Once you selected an image, tap “Next”
Step 2: Create a Title And Description For Your Pin
Add Descriptive Detail to Your Pin
Don't skip this step!
Pin descriptions really do matter on Pinterest …
A lot!
It's crucial to get them right for the sake of your audience and the Pinterest algorithm.
The best descriptions give more context to your pins and boards.
They also give your Pinterest audience a clue as to what your pin is about, as well as the type of content they will find pinned to your board.
Pinterest SEO is a subject that most bloggers don't concern themselves too much with …
But mastering it can have a massive impact on your Pinterest marketing efforts.
Your pin descriptions must tell people about the pin and entice them to want to click through to learn more.
What’s the result of writing great Pinterest descriptions?
You will have an easier time driving engagement, traffic, and reach.
In short, the better your descriptions, the more distribution you'll experience …
And the more traffic you will be able to drive to your blog post.
Follow these tips to write great Pinterest descriptions:
- Include Your Business Name:
Include your business name within the first sentence of your description.
Doing so has been proven to lead to higher conversions for email sign-ups.
- Use Clear and Actionable Language:
Include a strong call to action.
This has been proven to increase online sales by 6% and email sign-ups by an impressive 70%!
- Add a Price to Your Description for Products:
This tactic has been shown to work effectively to increase sales.
Step 3: Add a Link to Your Blog Post or Site
Links are the Bridge to Your Site
You should always add a link to your blog post with every pin you create.
The link could lead to …
- A blog post
- Company website
- Online store
- Anywhere else you want to send your Pinterest traffic
When users see something they like, they can click on the link to find out more about the pin, and potentially proceed to purchase your product.
According to recent statistics, Pinterest drives almost four times as many sales as other platforms.
With over 322 million monthly users on the platform, you can see why it's important to market to your business’s target audience on the platform.
Fortunately, it's very easy to add links on Pinterest compared to Instagram, which is why Pinterest is a valuable social media platform for bloggers.
Step 4: Add Relevant Hashtags

Hashtags for the Win!
Ideally, your blog post that you are linking to should give you an idea of what keywords to use when posting it on Pinterest.
Pinterest is similar to Google search.
In what way, you ask?
Once someone types a search term in the platform's search bar, they are served with the best and most relevant results for that particular keyword.
There is also a “suggest keywords and topic” feature at the top of the page.
This tool can help to give you ideas for your hashtags.
For instance, in a search for “black running shoes,” suggested topics include Outfit, Women, Nike, Men's, Adidas, etc.
You can simply click on any of the suggestions that are relevant to you to refresh the results and include that particular search term.
You can then use these keywords as your pin’s hashtags.
Hashtags are very important on Pinterest …
Whenever pinners search for keywords, there's a good chance the hashtag equivalents of those keywords are being followed by a lot of Pinterest users, as well.
This can help you optimize your Pinterest posts for SEO.
After all, Pinterest is a visual search engine …
Just like Google and all other search engines, keywords are the foundation for content discovery on the platform.
Step 5: Choose Your Pinterest Boards Wisely
Boards Organize Your Material
Boards are the folder you want to drop your pins into to keep them organized.
They also double as another searchable term to boost traffic to your site.
It is a good idea to create a few boards before you start pinning images from your blog.
Create a few relevant ones that will highlight the theme of your overall blog posts.
Bonus Board Creating Tips:
- Build boards that reflect your blog’s menu, categories, or tags. This will help you to keep things consistent and relevant.
- Fill out the board descriptions with some good search terms (keywords) that reflect what your main topics are about. You may even get some traffic to your boards directly from Google.
- Create at least one board that is a “catch all” … but use it sparingly. Try not to dump all your pins in this board; it should be reserved for one off topics that you write about.
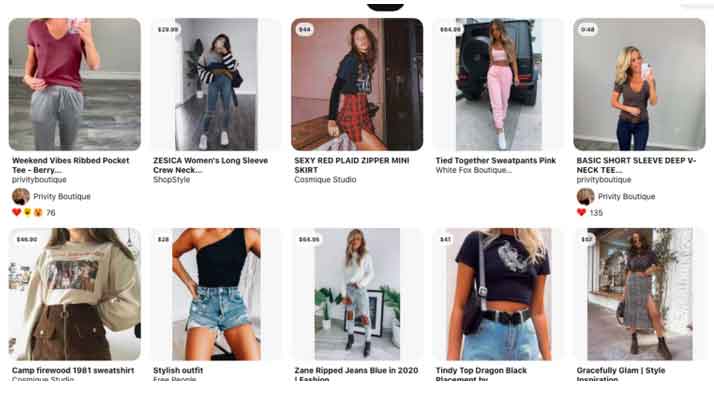
Pin A Pinterest Picture That Is Worth A Thousand Words [Or Clicks]
Images on Pinterest can help your audience find more information on the products they are looking to buy.
These images may also serve to inspire them on a future project.
Pinterest really is the “Google” for images.
What does this mean for you?
It means that Pinterest can drive significant traffic to your blog if you play your cards right …
Pinterest is all about visuals.
According to a recent Pinterest study, over 85% of users on the platform place a lot more importance on images and videos than text.
This means that if you can create attractive visuals, you will be able to garner a lot of attention on the platform.
But what exactly makes a great pin?
As it turns out, there are certain things that work well on Pinterest for images, some of which we discuss below.
Just keep this in mind:
Although visuals are crucial to your success on the platform …
It's still important for you to get your “copy” looking good as well.
Now, follow these tips to create great pins that deliver on all fronts:
Use Vertical Images:
The majority of pinners use mobile devices.
So, make sure you use the optimal aspect ratio of 2:3 to ensure that your image doesn't get cut.
Also, aim for the highest possible image quality.
For example:
- Create a 400 x 600 px pin for a short pin version
- And 1000 x 1500 px for a long pin version
Use Branding That Connects You To Your Audience:
You already know that branding is very important for your entire blog.
The same goes for your Pinterest account …
It also extends to other places where your users or customers will run into you.
A powerful way to ensure you are consistent is to build a few of your own templates.
These templates should display the following:
- Brand Name
This goes without saying, but having your name on your pin etches your brand into the mind of those clicking on your pin.
- Logo
Hopefully … if you have a blog, you also have a logo.
If not, then you want to create or have one created.
Then use the same logo everywhere. This doubles as a watermark so your images don’t get stolen.
- Main Blog Site URL
This further solidifies your brand.
- Relevant Image for Your Blog Post
Stick with using a picture.
Or you can have a blurred background with a catchy blog title.
Make sure it is relevant to what the reader is expecting.
- Add Your Pinterest Posts to your Blog Post
Add two Pinterest-sized photos to your blog post to make it easy for your blog readers to pin them.
We usually add four to ours.
While we sometimes only use three, we have the direct photo url to easily use for future pinning.
What’s the overall purpose here?
Be consistent!
Build a few templates to make it easier to do this, and let the picture speak a thousand words.
3 Pinterest Posting Hacks to Get More Traffic to Your Blog
Not everyone manages to drive a consistent flood of traffic from Pinterest to their blog …
But those who do manage to do it have a few specific tactics in common.
Need a few Pinterest posting hacks that will help you bring more people to your posts?
Here are some of the most effective ones …
Hack #1 – Add the Pin-It Button to Your Posts
Adding the “Pin-it” button to your blog posts helps your visitors to easily pin images they find on your site.
The visitors simply have to click the button, and they will be able to pin your post instantly.
You can find some some social media plugins that can do this or you can add this directly to your wordpress footer.php file
Setting up and installing the button only takes a couple of minutes with a plugin.
Yes, this is a bit of extra work …
But your efforts will be rewarded with an additional flow of traffic to your site.
Hack #2 – Use the Browser Extension To Add Pinterest Pins
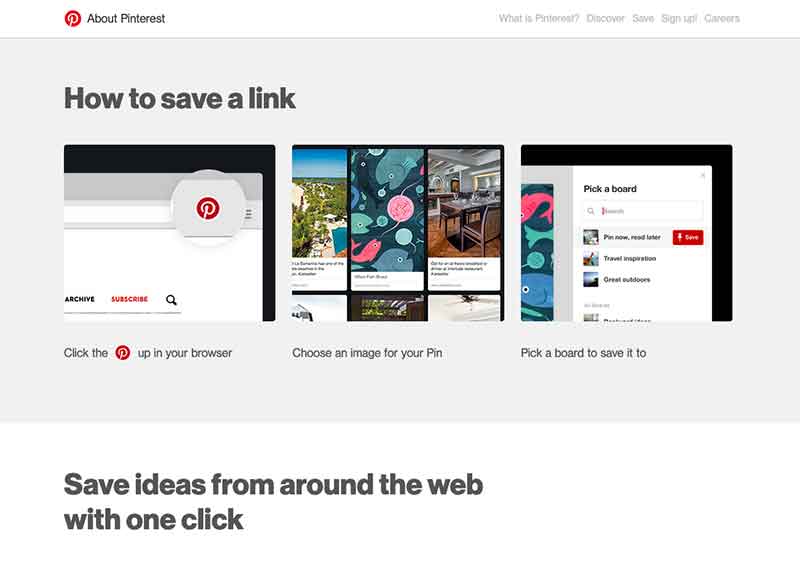
You can also save images to Pinterest using the browser extension.
With this extension, you can quickly and easily add pins to your boards from images on social media or webpages.
If a site has the feature for pinning images enabled, all you have to do is hover over each image, and a “Pin It” button will appear.
Simply click on it, and your pins will be saved automatically.
Alternatively, you can save time and effort by using the browser extension.
Here's how to post to Pinterest using the Pinterest browser extension:
- Follow the steps to install the Pinterest browser extension. It's available for Firefox, Microsoft Edge, and Chrome.
- As you visit blog posts, simply click on the Pinterest logo directly on your browser.
- Next, choose the image you want for your pin.
- Finally, select the board you want to save the image to, and you're done!
Hack #3 – Schedule Pins to Save Timehow
When using Pinterest for your business, you can save time by scheduling new Pinterest pins with a pin-scheduling tool.
Pro Tip: Use that gained time to create more blog posts.
Whether you manage multiple Pinterest accounts, team members, or different social media channels …
The best tools will allow you to track everything from one convenient place.
Ultimately, scheduling tools will help you save time, improve teamwork, and streamline all your Pinterest marketing tasks.
There are plenty of options to choose from, including
- ViralTag
- SocialChamp.io
- TailWind
These tools help you schedule pins so you can publish them at optimal times.
When is this?
When your audience is likely to see and engage with your content.
When using scheduling tools, here are a few important factors to keep in mind:
Posting Frequency
Although it’s important to pin consistently, Pinterest doesn't want you to get spammy.
So, only use one picture per URL on relevant boards.
Instead of creating a new board and filling it up right away, pin something to your board once a day.
This will help ensure that your content reaches a much wider audience.
Schedule Seasonal Content Ahead of Time
When learning how to post on Pinterest, one of the first things you need to do is learn how to plan ahead.
Seasons and holidays can be a big opportunity for your blog to experience a boost in traffic!
Plan your seasonal content about 30 to 45 days in advance, as recommended by Pinterest.
Final Thoughts
And there you have it!
You now possess the knowledge of how to post on Pinterest …
All that is left to do is for you to create your Pinterest business account, log in, and start pinning.
Use this article as your resource to help you get started pinning attractive and engaging images that will drive a flood of traffic to your blog.
Did you find this article helpful? If so, pin it for later!